
By Kim Buddington
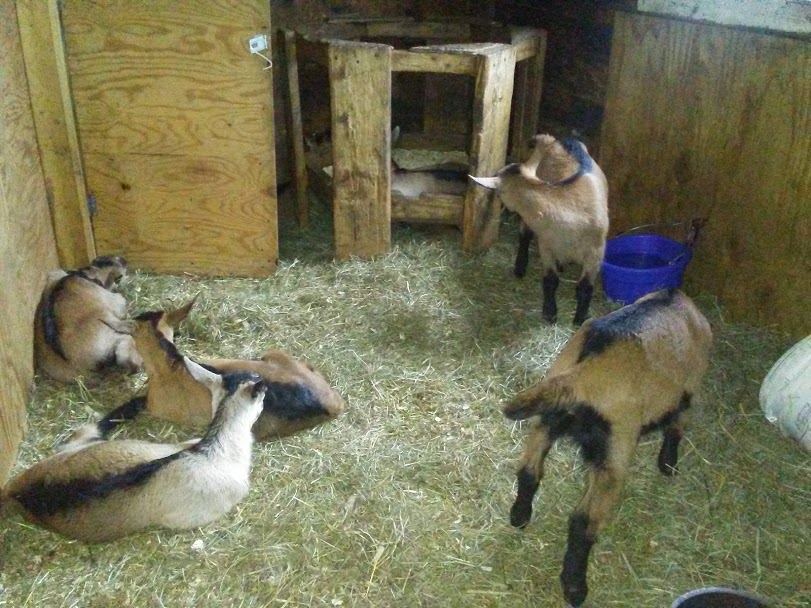
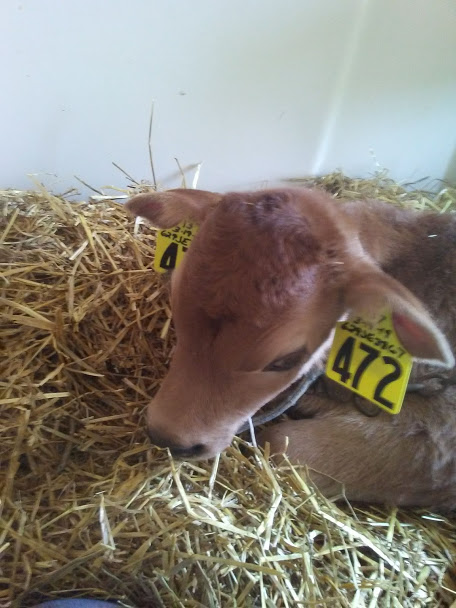
For many farming folks, the most wonderful time of the year is here. Well, the most wonderful…and stressful…springtime kidding/calving/lambing season. Babies are everywhere! Goat kidding season has started back on my family’s farm. My social media feeds are also jammed with newborn livestock of all types. Although I’m currently not working directly with newborn calves or laboring does, I can vividly imagine the sounds, smells, and sights of this exciting season.
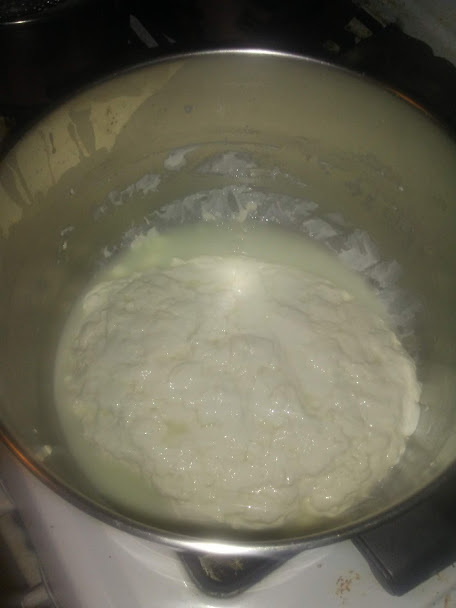
If you are a homesteader raising dairy goats, cattle, or sheep and you are not yet awash in excess milk, you will be soon, right? Then the fun of figuring out how to put the extra milk that the babies aren’t drinking to good use in your kitchen begins. Cheeses, fudge, ice cream, pudding, butter…insert your favorite homemade dairy treats here! With being able to oversee the entire process- from feeding and housing your lactating animals to harvesting and processing the milk- you have the blessing of being able to consume products of the highest quality, which you know will meet your standards firsthand.
When producing milk for home use, what can you do to help ensure that you and your family are consuming a safe and high-quality product? No, you don’t need facilities that would pass a “Grade A” inspection just to have good milk. That would be an extreme, unattainable expense for the average homesteading family, and simply (in my opinion) not necessary.
Here are some tips to help you obtain high milk quality- in your regular old backyard, barn, and kitchen. If you’re new to having dairy animals, I hope this post helps simplify things and gives you peace of mind. If you’re seasoned at this stuff, please continue to read anyway. Everyone can use a little reminder from time to time (myself included), right?
Nail that pre-milking routine!

Your pre-milking routine is an essential step in producing quality milk! It’s so simple, yet it can sure be tempting to rush through on those busy mornings. If you start clean, you are much more likely to end clean. Plus, if you are choosing to consume raw milk, this is even more crucial.
Check your animals over the first thing when you bring them into your milking area. Are they acting normal? Any signs of sickness can quickly be investigated further and treated if need be while you have them confined.
A “pre-dip” is a solution that is applied to the teats before milking. It kills bacteria and helps loosen up any caked-on manure. There are many options on the market. Please use something that is labeled and proven as effective as a pre-dip. Iodine based dips are a popular option and widely available. At the commercial dairy where I work, we use an iodine-free concentrate. All you need to do is mix the solution with water and bleach. This product is available from a company called Chosen Acres. Some pre-dip solutions can also be used post milking to help prevent new mastitis infections from starting.
You’ll need towels to clean and dry the teats after dipping, either disposable paper towels or reusable cloth rags work well. If using washable towels, make sure that they are thoroughly machine washed and dried between uses. Take care that the whole teat is squeaky clean, especially at the bottom end, where debris can be easier to miss.
Avoid using excess water to clean udders. If you do need to do extra washing of a very dirty udder, make sure the udder is dry before milking to keep bacteria laced water from trickling down the sides of the udder and into your milking pail! (1)
Before attaching the milking machine or grabbing your milk pail, strip out the first few streams of milk into a separate container or towel. This way, you can check for any signs of abnormal milk, which might mean your “girl” has mastitis. A good pre-milking program of dipping, wiping, and fore-stripping all help with the oxytocin release that leads to milk let down. A good let down means a better, more complete milk out, which can help prevent mastitis infections and keep the bacteria count in your milk lower. (1)
Get some gloves
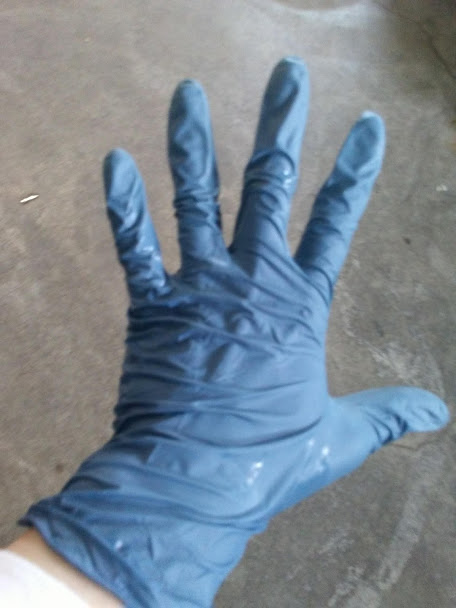
Glove up, guys and gals! Get a box of disposable vinyl or nitrile gloves from the drug store or dairy supply. Gloves are worn in foodservice establishments for a reason. You are producing food for your family when you milk your cows, goats, sheep, etc. So why not wear them? A gloved hand can be better sanitized between animals during the process, protecting you, your animals, and the milk. Plus, long term exposure to teat dip on your skin can leave your hands dry, irritated, and stained.
Get it cold
Ok, so the morning or evening milking is done. You’ve got milk in your pail or machine bucket. Now what? For the best quality milk, you need to get that milk chilled down to below 40 degrees Fahrenheit as quickly as possible! Quick cooling slows the multiplication of microorganisms that can impact the quality, flavor, safety, and shelf life of your milk.
In many modern commercial milking setups, milk is pumped through something called a plate cooler, which flash cools the milk before it even reaches the bulk tank. On our hobby farms, we want to do our best to achieve the same effect, with less sophisticated equipment of course.
Whatever you do, don’t let warm fresh milk sit out for long periods. Filtering the milk right after milking into smaller containers that are immersed in ice water is a handy way to speed up cooling. Agitate the containers every once in a while too. If you don’t have ice, even a cold water bath is better than just placing a warm jar of milk into the fridge.

Keep it cold
I hope this is common sense to most, but once it’s cold, you want to keep it that way! If you find that your milk, either pasteurized or raw, is going bad too quickly, first check the temperature controls of your fridge and make sure it is below 40 degrees F. Rotate your milk each time you bring fresh in, so that you’ll always be using the older stuff first. Avoid storing milk on the door of the refrigerator if you can.
Cleanliness wins the game

If there is one thing I’ve learned from working in milking parlors and a dairy processing plant…it’s that the cleaning never ends! Whether you milk one cow, ten goats, or 100 of each…cleaning and sanitation protocols are essential for safe, clean milk. Here are some specific things to pay attention to:
Cleanliness in your barns/yards
- Do your animals have clean, dry bedding? Well maintained stalls and barns will keep udders cleaner and healthier…and you know what else that leads to!
- Are your walkways to and holding pens outside the milking area relatively tidy and well-drained? This one can be hard, especially during inclement weather. But try to keep excess manure scrapped out or think about ways drainage can be improved in these areas.
Cleanliness in your milking parlor
- Do you wash down or sweep out the milking area after each milking? Among other things, this keeps odors down, which can impact milk flavor, and helps with fly control.
- If you have a machine milking set up, how are your milk hoses and inflations? Even with careful cleaning, these parts wear out and should be swapped out periodically. If inflation liners are cracking or if milk hoses fall off the bucket or claw constantly or are extremely discolored…it’s time to look into changing them.
- Are vermin under control? What about flies? It’s best not to store feed and grain in your milking area, but if you have to, use rodent-proof containers. If your buildings are overrun with rats or other nuisance wildlife, consider contacting your local exterminator. They can take care of these problems in a safe, legal manner. There are many diseases that these animals can carry, and they should certainly not be running rampant in a place where you are handling milk.
- Do a good deep cleaning every once in a while. You don’t need to do this after every milking, but every few weeks, give everything in the milking parlor a good scrub down.
Cleanliness of your milk handling equipment
- Do you rinse milk residue off your pails and strainers ASAP after milking? It’s tempting to set that aside and do other things for a while! If you don’t rinse right away with lukewarm water, you run the risk of having more issues with a yucky biofilm thanks to milk proteins, minerals, and bacteria (“milk stone”) building up on your equipment. (4)
- Do you have the proper chemicals on hand for washing and sanitizing your equipment? It’s highly recommended that you use chemicals made and approved for milk handling equipment. These solutions are designed to be mixed to a specific concentration to be effective in getting your equipment nice and clean every time. You’ll want an alkaline based detergent for daily use, and an acid based compound that you can use to help prevent and break down milk stone deposits. NEVER, EVER mix acid-based chemicals with alkaline chemicals!!! Keep containers well marked and away from children! To keep bacteria counts as low as possible, always air dry your equipment. You can also dip or spray your milk contact surfaces with a dilute bleach solution right before milking or processing.

If in doubt…take a sample
Grade A licensed dairies and processors are legally obligated to have many lab samples taken for screening. Milk is sampled for multiple types of bacteria, antibiotics, somatic cell count, and more. Maybe you have concerns about your milk safety, zoonotic disease risk in your herd, or you’d just like to know how you’re doing when it comes to the quality of your homestead milk.
Check with your local DHIA (Dairy Herd Improvement Association) and see what kinds of lab testing they have available. Some available options may include mastitis screenings and other bacteria plate counts. You might also be able to get help from your state department of agriculture or your veterinarian.
I hope you’ve enjoyed this article and found it helpful. While there is undoubtedly a lot that goes into it, nothing beats enjoying a nice fresh glass of milk or other dairy product that you’ve produced at home. Good luck on all your spring births and happy milking!

Do you have any other tips for producing the best milk possible on your homestead? Let me know in the comments!
Resources
